Wednesday, 12 April 2023

Bluetooth Name Changing

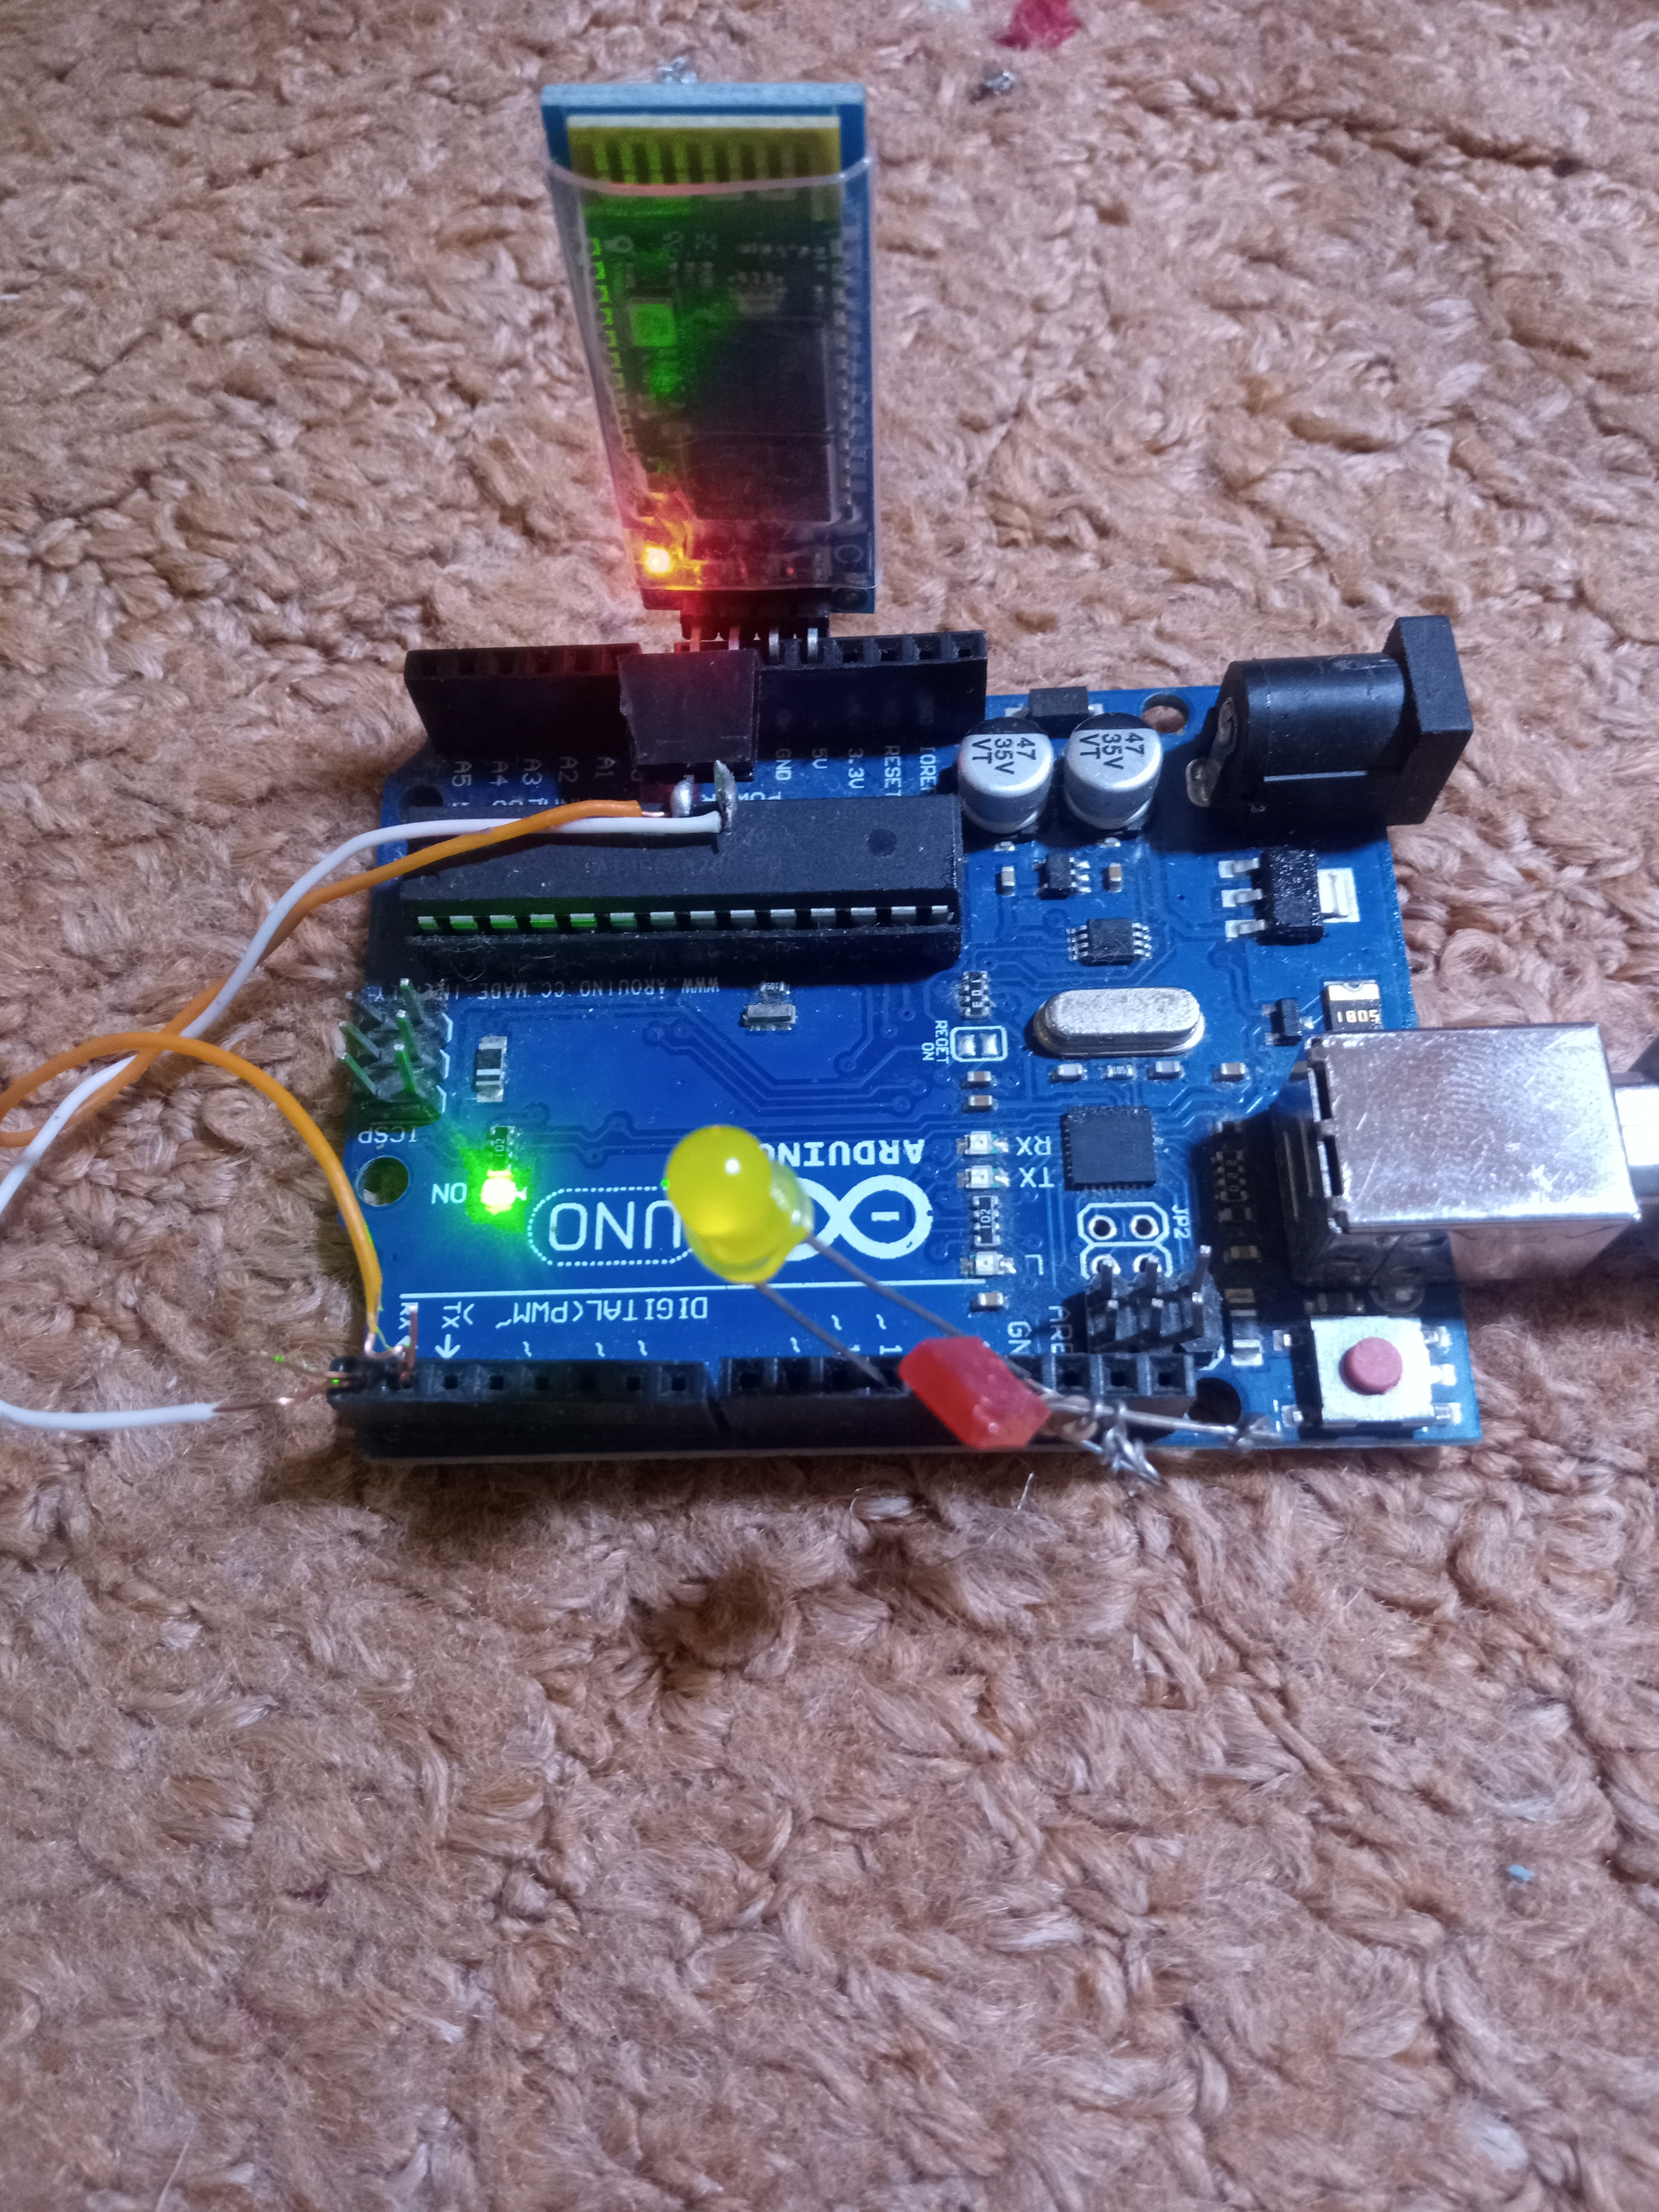
 After  uploading the codes , use serial moniter and apply AT commands to change the name 


#include <SoftwareSerial.h>

SoftwareSerial hcSerial(11, 10); // TX, RX


String fromPC = "";


void setup() { 

  Serial.begin(9600); // hardware serial for the USB-PC

  hcSerial.begin(9600);  // software serial Arduino to HC-06 (9600 is default)


  // print instructions

  Serial.println("HC-06 AT Command Programming");

  Serial.println(" -- Command Reference ---");

  Serial.println("AT (simply checks connection)");

  Serial.println("AT+VERSION (sends the firmware verison)");

  Serial.println("AT+NAMExxxxx (to change name to xxxxx");

  Serial.println("AT+PINnnnn (to change password to 4 digit nnnn");

  Serial.println("AT+BAUDn (to change to baud rate #1");

  Serial.println("  BAUD1 = 1200");

  Serial.println("  BAUD2 = 2400");

  Serial.println("  BAUD3 = 4800");

  Serial.println("  BAUD4 = 9600");

  Serial.println("  BAUD5 = 19200");

  Serial.println("  BAUD6 = 38400");

  Serial.println("  BAUD7 = 57600");

  Serial.println("  BAUD8 = 115200");

}


void loop() {

  // Read from HC-06

  if (hcSerial.available()) {

    while(hcSerial.available()) { // While there is more to be read, keep reading.

      Serial.print((char)hcSerial.read());

      }   

  }


  // Read from PC

  if (Serial.available()){

    delay(10); //     

    fromPC = (char)Serial.read();    


      hcSerial.print(fromPC); // show the HC-06 responce

      Serial.print(fromPC); // echo it back to the PC


  }

}

Thursday, 2 March 2023

Capacitive Fingerprint Sensor With Arduino


Capacitive Fingerprint Sensor With Arduino 


No enrolment or reading 

complete sketch, 

there is much difference found in sensor wiring,


---------------------------------------------------------------------------------------------------


#include "LiquidCrystal_I2C.h"

LiquidCrystal_I2C lcd(0x3F, 16, 2);


Tuesday, 15 November 2022

Felezjoo Detector with no counter

 This is my new compact Felezjoo detector with 3.7Vdc battery backup charging from any mobile phone charger  including  C-Type. 

Some changes like i used 2N7000 instead FET BS170  and instead of BC337 i used 2N3904

Voltage buckup module used to stepup the voltages to 18Vdc, 1x1 coil used  


Tuesday, 10 May 2022

Arduino SIM800L IMEI CHANGER

Below mentioned code can change any GSM module IMEI 

of faulty registered IMEI can be re-use in this Case,

AT+SIMEI command will be used in this case 

https://youtu.be/hOJCJVk-5JE

Another video for updating Nokia IMEI on sim800

https://youtu.be/In8d8y4rQqM


IMEI finding
delay(4000);
     SIM800L.println("AT+GSN");
      delay(1000);

----------------------------------------------------------------

#include <SoftwareSerial.h>


void setup() {


  Serial.begin(9600);


  delay(100);


  Serial.println ("AT+SIMEI=863789000008218"); } // Enter desire IMEI #

void loop() {}


Best Power supply for Sim800L module

Title of the document


Sunday, 5 September 2021

Arduino Car Alternator to Brushless Motor conversion

 Arduino Car Alternator to Brushless Motor conversion 

Below is the simple Arduino control car alternator working as a powrfull motor 
Here simple ESC 30 Amps were used 
1). Need 12VDC connected to the internal coil of alternator first

2). 12VDC also need to be  connected to ESC 

3). Arduino will get 5V from the ESC buit-in 5VDC output

4). ESC connected to arduino  pin # 8

5). 10 K resistor connected to  arduino A0

https://web.facebook.com/ksfelectronics

servo esc;    

void setup()

{

esc.attach(8); 

esc.writeMicroseconds(1000); 

}

void loop(){

int val;                           

val= analogRead(A0);   

val= map(val, 0, 1023,1000,2000);                                                          

esc.writeMicroseconds(val);      

}

Check the video:

https://www.youtube.com/watch?v=LzQ_vyZUGTU


Friday, 13 November 2020

Arduino Bluetooth Remote control

Complete Bluetooth Remote control Project  

Arduino Bluetooth Remote control with APK

A great Bluetooth Remote control for your home automation , 


...............................................................................................

Check Video: 


https://m.youtube.com/watch?v=j2HYM4YbRK0


1). 1k Resister
              2). Any NPN transister
 3). 5 Volt Relay
     4). Arduino  nano
          5). Bluetooth module
            6). 5 volt power supply
                                              7). Arduino 6 & 7 pin used with bluetooth 


MIT Codes


Below are the Arduino codes 


#include <SoftwareSerial.h>
SoftwareSerial mySerial(2, 3); Bluetooth  module connected to 2,3 pins of ardiuno
#define relay1 A1
#define relay2 A2
#define relay3 A3
#define relay4 A4
char val;
void setup() {
pinMode(relay1,OUTPUT);
pinMode(relay2,OUTPUT);
pinMode(relay3,OUTPUT);
pinMode(relay4,OUTPUT);
digitalWrite(relay1,LOW);
digitalWrite(relay2,LOW);
digitalWrite(relay3,LOW);
digitalWrite(relay4,LOW);
mySerial.begin(9600);
Serial.begin(9600);
}
void loop() {
//cek data serial from bluetooth android App
while ( mySerial.available() >0 ) {
val = mySerial.read();
Serial.println(val);
}
//Relay is on


if( val == '1' ) {
digitalWrite(relay1,HIGH); }
else if( val == '2' ) {
digitalWrite(relay2,HIGH); }
else if( val == '3' ) {
digitalWrite(relay3,HIGH); }
else if( val == '4' ) {
digitalWrite(relay4,HIGH); }
//relay all on

//relay is off
else if( val == 'A' ) {
digitalWrite(relay1,LOW); }
else if( val == 'B' ) {
digitalWrite(relay2,LOW); }
else if( val == 'C' ) {
digitalWrite(relay3,LOW); }
else if( val == 'D' ) {
digitalWrite(relay4,LOW); }
//relay all off
}